How Can We Help?
To sharpen a straight edged knife blade you'll need a sharpening stone. Sharpening stones often have two sides for coarse and fine grit sharpening. You can also find sharpening kits that have multiple grits and allow you to progress from coarse to finer grits as you sharpen. For serrated knives, you'll need a tapered stone or ceramic sharpener.
 |
 |
Straight Edge Blade
- Start off with the rough grit. If you have a particularly dull blade, start off with the rough grit side of your sharpening stone. Rough grits tend to be more porous than finer grits and feel rougher to the touch.. Additionally, if you put water on one side and it soaks into the stone, chances are it’s the rough grit.
- Prep the stone. If you’re using a lubricant, get it out. Pour an ample amount of mineral oil all over the surface of the stone. You don’t need to drench it, but don’t be stingy either. The lubricant helps ensure that bits of stone don't fill in the pores and dull your sharpening stone.
- Place the knife blade flat on the stone and raise it to a 10 to 15 degree angle. The key to knife sharpening is maintaining a constant angle. Different knives require different sharpening angles. For a pocket knife, shoot for a 10 to 15 degree angle. This will give you an edge that’s sharp enough for most daily needs. Keeping a constant angle by hand takes a lot of practice. Another option is a sharpening guide that guides the knife at the desired angle.
- Start sharpening the first side of the blade. With your blade set at the correct angle, you’re ready to start sharpening. Imagine you’re carving off a slim piece of the stone’s surface. Either bring the blade into the stone, or stroke the blade away from the stone. If the knife blade is curved or if it’s longer than the stone, you’ll need to sweep the blade sideways as you work, so the entire edge is sharpened evenly. Apply moderate pressure as you sharpen and do not bear down hard on the blade. After you make one stroke, start back at the beginning and repeat. Do this about 6-12 times.
- Sharpen the other side of the blade. Flip the blade and do the same thing on the other side.
- Take alternating strokes. After you’ve sharpened each side, make several alternating strokes - sharpening one side and then sharpening the other successively.
- Flip the stone over on the fine grit and repeat above process.
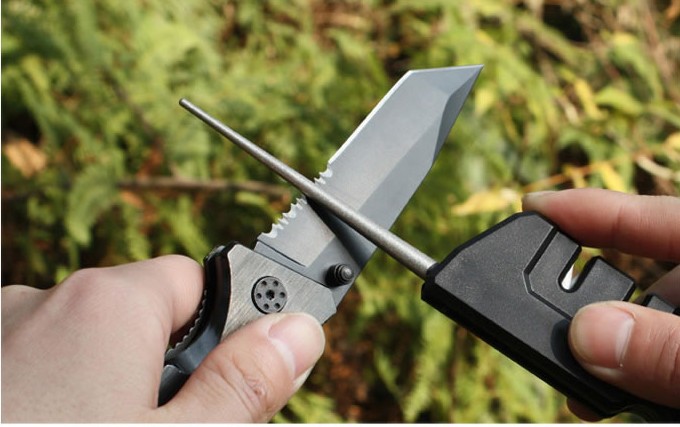
Serrated Blade
Serrated blades hold their cutting ability long after a straight edged blade will go dull, however they are much more difficult to sharpen. A flat stone or steel will grind off your serrations therefore use a tapered or cylindrical ceramic for this job. Each separate serration much be sharpened individually.
Serrated blades have a grind on one side of the blade. Only sharpen the grind side of the blade. Hold the sharpener at the angle that matches the original edge angle. Hold the knife with the edge away from you and the serrated side of the edge facing up. Set the tapered diamond sharpener in a serration so that you fill the indentation. Draw the sharpener towards the edge.
The goal in sharpening a serration is to maintain the ramp of the serration right to the edge. You do not want to create an edge bevel. One trick, with a felt pen, paint the serration to be sharpened and follow your process. Evaluate if you are removing all the black. It should not take more than 5-8 strokes to resharpen if your angle was correct. Rotate or spin the sharpener as you go for the most even, consistent sharpening.
Recreating the "Initial Sharpness" on a serrated knife is difficult even if you use a tapered sharpener. But you can expect to get a "serviceable" edge. A serrated blade is more easily distorted through sharpening than a straight blade edge. So, don't sharpen unless dull spots are truly visible.
Sources:
- http://www.artofmanliness.com/2009/03/05/how-to-sharpen-a-pocket-knife/
- http://www.buckknives.com/about-knives/knife-sharpening/